
(Anycubic i3 Mega 3D Printer courtesy of GearBest.com)
Here is my review of the Anycubic i3 Mega 3D Printer (Ultrabase version). I also included some observations and tips, hopefully helpful to you if you’re investigating this printer.
Anycubic i3 Mega Pros: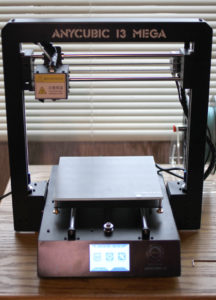
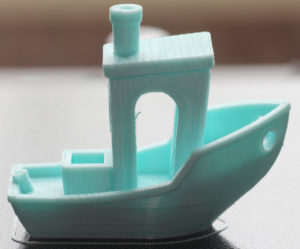
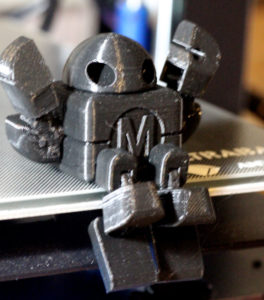
- The printer produces very nice prints. So far I’ve printed with PLA and PETG, using test models and my designs, mostly using default settings
- Incredibly easy assembly
• connect frame to chassis with 8 hex cap screws,
• plug in 3 color-coded cables - Printer has a sturdy steel frame with no plastic printed structural parts. The filament sensor and its mount on the current model are plastic.
- The color graphic 3.5 inch TFT LCD touchscreen display is easy to read and use.
- Circuitry is not exposed; it is contained within a steel chassis.
- Wiring is bundled in spiral wire wraps or plastic tubing.
- Fans are safely enclosed.
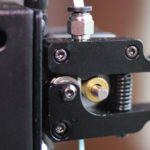
- All metal right-handed direct-drive bowden extruder with well-constrained filament path
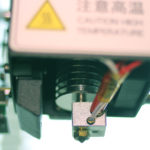
- All metal J-head hot end
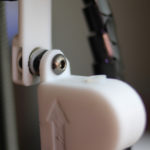
- Includes filament sensor.
- Included extras:
• filament spool holder (unassembled, acrylic)
• extra J-head hot end assembly
• extra limit switch (end-stop)
• 1kg PLA filament
• various tools: pointed tweezers, scraper (spatula), diagonal flush cutters, allen wrenches, open ended wrenches, screwdriver, gloves
• SD card with firmware, old version of Cura, sample print
• USB SD card adapter
• USB cable - The Ultrabase perforated glass heated bed has worked well for me so far. Prints adhere well yet are easy to remove.
Anycubic i3 Mega Cons:
- The Menu>Tools>Filament>Filament In function sets the temperature to 230°C, too high for PLA. This doesn’t happen every time.
- The magnet-mounted filament sensor, mounted under the extruder, gets knocked around by the heated bed cable when printing lower layers. It falls off the magnet. Maybe I can tie down the cable or improve cable routing.
- The menu organization doesn’t always make sense to me:
• Menu>Setup>Home and Menu>Tools>Axes items could be combined into one screen or grouped together. Both functions are for moving motors, but are in different menus (Setup and Tools)
• Menu>Setup>Temp, Menu>Tools>Preheat, and Menu>Tools>Cooling could be combined or grouped together. All 3 functions are for setting temperature, but are in 2 different menus (Setup and Tools).
• Menu>Print goes to Menu>Setup>Status, but pressing the [return to previous menu] button after printing should go back to Menu>Print instead of Menu>Setup. The Menu>Setup>Status [Print] button is inactive (gray) after printing, so printing the next print takes at least 5 button presses, even for the same print.
 Anycubic i3 Mega Observations:
- Menu>Setup>Status should display a time remaining estimate, not only the elapsed time.
- The printer beeps for feedback whenever you touch the screen, but maybe it should only beep when you touch an actual control, not any inactive area.
- After pressing the [Print] button, the printer first heats the bed and then the nozzle. The bed and nozzle heating probably should be done simultaneously as the printer does in the Menu>Tools>Preheat function.
- The current printer model no longer auto-levels because inductive proximity sensors work with metal, not glass like the new Ultrabase heated bed. (Not complaining)
- A zip tie, that holds the extruder cable, placed around the back-right bed-leveling spring, can potentially mess up bed leveling.
I’d prefer a more aesthetically pleasing warning label, for example a small Anycubic logo along with the warning. - Four fans (2 chassis, printed part cooling, hot end heat sink) can be loud.
- Printer is heavy at 14.5 kg and has a somewhat large footprint at around 41cm X 41cm (16” X 16”).
Anycubic i3 Mega Tips:
- Three loops of skirt seem to be sufficient to get filament flowing nicely for small prints.
- More retraction than the default 6.5mm works better for me for bottom layer detail and adhesion. I’ve tried 7.5 – 9mm.
- Adhesion can be maintained by cleaning the cold Ultrabase print bed with cloth slightly dampened with water, then drying.